
This is the DIY Lisa Frank nails tutorial your early 90s self has been waiting for.
It was (somewhat) recently back to school season which means that my local mega retailer was filled to the brim with lots of cute notebooks, pens, and little animal shaped rings which were actually erasers that I didn’t really need (but maybe bought anyway).
Amongst all the planners and trapper keepers, there was a literally shining pack of Lisa Frank stickers.The Lisa Frank, of the rainbow bright animal drawings from all your school supplies in the 80’s and 90’s. She is back in the game after what feels like a decade of hiding under the radar.
So to celebrate back to school and Lisa’s awesome, over the top art, here is a Lisa Frank nails tutorial to get you in all the right moods.

First you’ll need a white base coat. I used just one coat of Sally Hansen Let’s Snow because you will be covering it up, so a totally perfect white base isn’t necessary. It really helps the colors that sit on top to pop, adding to the blindingly bright rainbow that is quintessentially Lisa Frank.

Then you will need to actually do that rainbow manicure so assemble all your best bright rainbow nail polishes. I’m using mostly Sinful Color nail polishes through out this tutorial because they are cheap and I’m not mad about wasting them.
READ MORE: 12 Lipstick Tips from Top Editors

Load up one of those foam cosmetic sponges you probably have sitting around your house with a layer of rainbow of polish. This will probably use more nail polish than you may want so you can get out ahead of it by dampening the sponge with water first, but I usually find that it takes much longer to build up the color if you work with a wet sponge, so it’s a catch 22. Your Lisa Frank nails will be perfect, though.

Take the polished up sponge and pat/roll over your nail until you’ve worked up enough color to have an opaque base. This can take a bit so you’ll probably end up needing to add more polish to the sponge until you’ve got the opacity you are looking for.

At this point your nails will look like a hot mess because there is literally nothing you can do to stop the polish from getting all over the skin around your nails. You could try to prevent this by applying peel off nail polish latex or even white glue in those areas but it’s really easy to just go back in with a cotton bud dipped in nail polish remover to clean up your nails.

Next you’ll be making the Jaguar spots so assemble more colors (including the very important pink and purple) and a medium sized dotting tool.

Take that dotting tool and make little uneven squiggly dots all over the nail. You can do this easily on your dominate and goofy hand so that is a bonus of this manicure. Try to place the colors in areas where they don’t blend in too much; orange will stand out more against the blue than red.

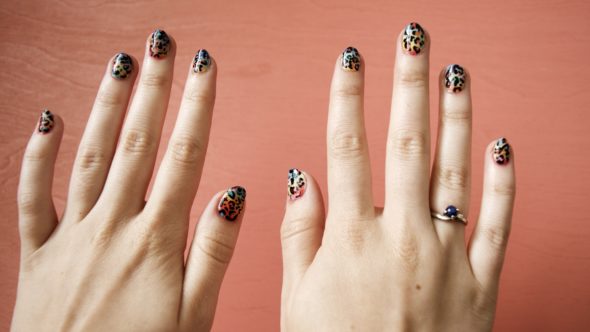
Then take a striping brush or a very thin paint brush and coat it in black polish, you will want to outline the spots but only kind of. A good rule of thumb is to line anywhere from half to two thirds of one spot and you can add a little dot in the center too. Add more half moon shapes and dots in the spaces between the spots to complete the leopard print.


Repeat on all your nails until you are done and cover with a thick top coat to seal all the layers of polish together.
You can sing “hallelujah” from all the joy your Lisa Frank nails will bring you at this point, obvi.