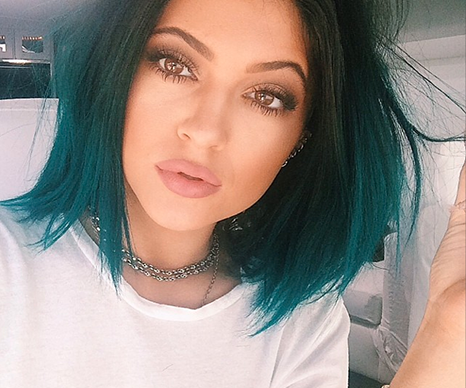
A Kylie Jenner blue hair how-to, because that’s exactly what your day needs.
If you’ve been pining after the Kylie Jenner blue hair look since she first rocked it years ago, you are not alone. Kylie’s blue hair is the result of expensive, carefully placed extensions, but you can rock the look at home without permanent damage or forking over thousands for natural hair extensions.
Here’s how to grab the look on a temporary, under $10 basis:
1. Start with clean hair.
Comb through it with a wide-toothed comb to break up any tangles. If you have curls, be sure to check out our guide to the best brush for curly hair before you color your tresses.
2. Identify the lightest pieces of your hair.
If you have chunks that are already bleached out from a prior ombre coloring session, use those. If your hair naturally has a lot of highlights, separate those pieces. If your hair is very dark, just find very small sections to separate—it’s easier for temporary color to bond to smaller areas than large ones.
3. Use a temporary color spray like High Beams Intense.
Hold about 6″ away from the hair shaft and pump the spray button until you’ve coated each section entirely. The Kylie Jenner blue hair look isn’t about an entirely blue head—it’s about strategic coloring. Shop the spray from $9 here.
4. Comb through one more time.
Then, hit your hair with a blast of cool air from your hair dryer to set the color. It won’t be permanent, but you should make sure it’s dry before heading out.
5. Be the prettiest smurf girl in town.
Game over.
Love this article? For more beauty, style, travel, and trending topics check out The Luxury Spot on Facebook. Like us and we’ll love you back!

