Leg contouring is a thing, because apparently there’s no such thing as going too far with makeup.
Summer is coming and if your pasty pins have seen better days, leg contouring might just be for you. It’s a pretty simple concept, right? We contour our faces to get the cheekbones of our dreams and add cleavage makeup to contour enhance our busts, why not sculpt your way to the calves you’ve always wanted? Our method is pretty simple but gets bonus points for being semi permanent so you don’t need to do it every day.

Step 1: Exfoliate
With any art, the canvas is one of the most important parts to the end result. We’re going to be using self tanner to do our leg contouring so we highly suggest starting with freshly scrubbed and exfoliated legs.
We like the Cane+Austin Face & Body Retexture Scrub for getting the smoothest legs of all time. It’s also great for helping cell turnover whenever you want to get rid of the self tanner we’ll be using.

Scrub-a-dub as best you can to make sure your legs are nice and smooth. Pay extra attention to areas that can grab onto tanning like your knees and ankles.

Step 2: Base Tan
Let’s call this step our foundation. You don’t want to head in with your contour to just plain old dry legs. Using a layer of a light sunless tanning lotion will help to even things out down the line, and add slip to make things easier to blend. We also love this sunless tanner for our neck makeup hacks.

We’re using the bog standard Neutrogena Build-A-Tan lotion because it doesn’t have a strong color to start off with, and it doesn’t have shimmer like many other tanning lotions.

Step 3 : Darker Tan for Contour
To get the leg contouring effect we’ll be using a darker tanning product for contrast. The Vita Liberata Self Tan Dry Oil gives an instant tan effect along with building a gradual tan just like the lotion we used. It’s super helpful because you’ll be able to get an immediate contoured look, and you’ll be able to see where you’ve placed the contour.

Step 4: Contour Thighs
We’re using an old Real Techniques Miracle Complexion Sponge to apply and blend our our leg contouring. You can opt for the sponge or for a tanning mitt if you’re precise. Starting on the thigh we’re bopping on a line right down the middle for a slimming effect.

You absolutely need to blend as you go along to make sure it doesn’t set and look blotchy.

Like this!

This is why the bopping technique is so important. You’d think you could just swipe a line and blend it out, right?

No. It was literally impossible to get a nice blend from a swiped line so please learn from our mistakes.
Step 5: Contour Calves

On the calf it’s more important to follow your muscles to get definition. You’ll do one line right down the side to begin with.

Then to get more contrast for your calf muscle, apply your darker tan from your ankle upwards, stopping just before the bottom of the calf muscle.

And again, blend as you go along for the best results. The swiped on line worked out better on the calf for creating a realistic effect. This is where we are in 2017, by the way, we’re trying to make our legs look perfect yet realistic.

Don’t forget the inner leg! Your calf muscle curves upwards, so keep following that line and blend it on out.

Just like that you’ve got the much more svelte legs that you couldn’t care less about in winter.

Step 6: Highlight
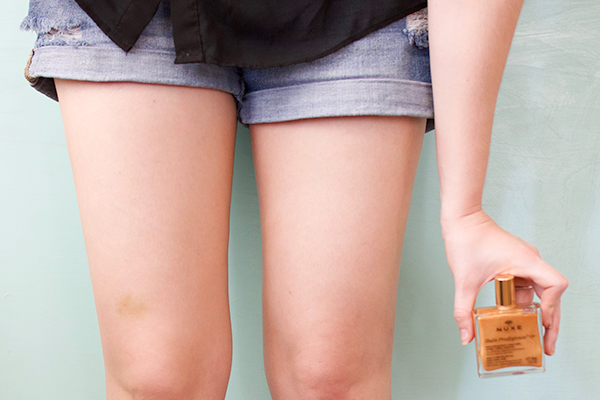
What is contouring without highlighting? Our last step is adding some shimmer just to the tops of the legs with the Nuxe Huile Prodigieuse Or shimmering oil.

It has shimmering particles that give your legs a moisturized, shiny look without looking glittery. Oh, and it smells really good too.

Just apply to the tops of your legs where you didn’t contour for a little extra oomph.

Love this article? For more beauty, style, travel, and trending topics check out The Luxury Spot on Facebook. Like us and we’ll love you back!


